|
|
| Line 9: |
Line 9: |
|
| |
|
| ==Enemy list== | | ==Enemy list== |
| {{Location enemies|Tenzan Pass}}
| | ===Tenzan Pass=== |
| {{Enemies list row|Highland Soldier|2|15|50|[[Medicine]] ×6<br>[[Greaves]]|Highland Soldier}} | | {{GetS2enemies|location=[[Tenzan Pass]]}} |
| {{Enemies list row|Highland Soldier|2|15|100|[[Medicine]] ×6<br>[[Leather Hat]]<br>[[Cape]]|Highland Soldier (spear)}}
| |
| {{Enemies list row|Commander|4|50|100|[[Mega Medicine]] ×2}}
| |
|
| |
|
| {{Location enemies|Area A (East Muse Principality)}}
| | ===Area A (East Muse Principality)=== |
| {{Enemies list row|Blade Bunny|3|40|50|[[Technique Rune]]<br>[[Cream Stew]] ×8|Blade Bunny (Suikoden II)|Blade Bunny (Suikoden II)}} | | {{GetS2enemies|location=Eastern [[Muse Principality]]}} |
| {{Enemies list row|FurFur|2|30|30|[[Clay Guardian Scroll]] ×2|FurFur (Suikoden II)|FurFur (Suikoden II)}}
| |
| {{Enemies list row|Holly Boy|1|10|5|[[Medicine]] ×4<br>[[Spinach Juice]] ×3|Holly Boy (Suikoden II)|Holly Boy (Suikoden II)}}
| |
|
| |
|
| {{Location enemies|North Swallow Pass}}
| | ===North Swallow Pass=== |
| {{Enemies list row|Bandit|4|35|150|[[Escape Talisman]]<br>[[Cheek Guards]]|Bandit A|Bandit (Suikoden II)}} | | {{GetS2enemies|location=[[North Swallow Pass]]}} |
| {{Enemies list row|Bandit|4|35|150|[[Medicine]] ×5<br>[[Rising Sun Bento]] ×5|Bandit B|Bandit (Suikoden II)}}
| |
| {{Enemies list row|Bandit|4|35|150|[[Hex Doll]]<br>[[Japanese Dish]]<br>[[Peeing Boy]]|Bandit C|Bandit (Suikoden II)}}
| |
| {{Enemies list row|Furball|4|40|35|[[Defective Urn]]<br>[[Octopus Urn]]<br>[[Celadon Urn]]|Furball (Suikoden II)|Furball (Suikoden II)}}
| |
| {{Enemies list row|Blade Bunny|3|40|50|[[Double-Jab Rune]]<br>[[Cream Stew]] ×8|Blade Bunny (Suikoden II)|Blade Bunny (Suikoden II)}}
| |
| {{Enemies list row|Killer Bee|3|22|15|[[Flaming Arrows Scroll]] ×2|Killer Bee (Suikoden II)|Killer Bee (Suikoden II)}}
| |
| {{Enemies list row|Wolf|5|60|60|N/A|Wolf (S2 PS1 enemy)|Wolf (Suikoden II)}}
| |
| {{Enemies list row|Mist Shade|10|800|2000|[[Drops of Kindness Scroll]] ×4|Mist Shade (Male)|Mist Shade}}
| |
| {{Enemies list row|Mist Shade|10|800|2000|[[Drops of Kindness Scroll]] ×4|Mist Shade (Female)|Mist Shade}}
| |
|
| |
|
| {{Location enemies|Area J (Kyaro Town area)}}
| | ===Area J (Kyaro Town area)=== |
| {{Enemies list row|Furball|4|40|40|[[Defective Urn]]<br>[[Octopus Urn]]<br>[[Celadon Urn]]|Furball (Suikoden II)|Furball (Suikoden II)}} | | {{GetS2enemies|location=Outside [[Kyaro Town]]}} |
| {{Enemies list row|Blade Bunny|3|40|60|[[Antitoxin]] ×5<br>[[Technique Rune]]|Blade Bunny (Suikoden II)|Blade Bunny (Suikoden II)}}
| |
| {{Enemies list row|Spider|5|60|100|[[Leather Cape]]}}
| |
|
| |
|
| {{Location enemies|Kyaro Town}}
| | ===Kyaro Town=== |
| {{Enemies list row|Highland Soldier|4|40|50|[[Medicine]] ×6<br>[[Greaves]]|Highland Soldier}} | | {{GetS2enemies|location=[[Kyaro Town]]}} |
| {{Enemies list row|Highland Soldier|4|35|50|[[Haziness Rune]]|Highland Soldier (spear)}}
| |
| {{Enemies list row|Highland Soldier|4|30|50|N/A|Highland Soldier (bow)}}
| |
| {{Enemies list row|Rowd|25|3000|10000|N/A|Rowd (sprite)|Rowd (enemy)}}
| |
|
| |
|
| {{Location enemies|Area A (East Muse Principality) 2}}
| | ===Area A (East Muse Principality)=== |
| {{Enemies list row|Furball|4|45|60|[[Defective Urn]]<br>[[Octopus Urn]]<br>[[Celadon Urn]]|Furball (Suikoden II)|Furball (Suikoden II)}} | | {{GetS2enemies|location=Eastern [[Muse Principality]] (Chapter 2)}} |
| {{Enemies list row|Shadow Dog|7|85|130|[[Haziness Rune]]|Shadow Dog (S2 PS1 enemy)}}
| |
| {{Enemies list row|Woodpecker|5|40|80|[[Wind of Sleep Scroll]] ×2<br>[[Fritters]] ×4}}
| |
|
| |
|
| {{Location enemies|Ryube Forest}}
| | ===Ryube Forest=== |
| {{Enemies list row|Giant Snail|8|80|200|[[Antitoxin]] ×4|Giant Snail (Suikoden II)|Giant Snail (Suikoden II)}} | | {{GetS2enemies|location=[[Ryube Forest]]}} |
| {{Enemies list row|Spider|7|100|100|[[Leather Cape]]}}
| |
| {{Enemies list row|Wild Boar|10|300|250|[[Pointy Hat]]<br>[[Cream Cutlets]] ×4|Wild Boar (Suikoden II)|Wild Boar (Suikoden II)}}
| |
| {{Enemies list row|Woodpecker|5|45|80|[[Killer Rune|Killer Orb]]<br>[[Fritters]] ×4}}
| |
| {{Enemies list row|Bonaparte|13|600|0|N/A|Bonaparte (sprite)|Bonaparte (enemy)}}
| |
|
| |
|
| {{Location enemies|Mercenary Fortress}}
| | ===Mercenary Fortress=== |
| {{Enemies list row|Highland Soldier|8|60|100|[[Defective Urn]]<br>[[Octopus Urn]]<br>[[Flower Vase]]|Highland Soldier}} | | {{GetS2enemies|location=[[Mercenary Fortress]]}} |
| {{Enemies list row|Highland Soldier|8|55|100|[[Chest Plate]]|Highland Soldier (spear)}}
| |
| {{Enemies list row|Highland Soldier|8|45|100|[[Medicine]] ×4|Highland Soldier (bow)}}
| |
| {{Enemies list row|Commander|11|120|250|[[Mega Medicine]] ×2}}
| |
|
| |
|
| {{Location enemies|Area B (Muse Principality)}}
| | ===Area B (Muse Principality)=== |
| {{Enemies list row|Gold Boar|11|250|300|[[Revenge Earth Scroll]] ×1|Gold Boar (Suikoden II)|Gold Boar (Suikoden II)}} | | {{GetS2enemies|location=[[Muse Principality]] ''(early game)''}} |
| {{Enemies list row|Poison Spider|7|130|100|[[Cheek Guards]]}}
| |
| {{Enemies list row|Sickle|10|70|200|[[Antitoxin]] ×4<br>[[Gale Rune]]}}
| |
|
| |
|
| {{Location enemies|Sindar Ruins}}
| | ===Sindar Ruins=== |
| {{Enemies list row|Creeper|12|120|50|[[Medicine]] ×8<br>[[Throat Drop]] ×4|Creeper (Suikoden II)|Creeper (Suikoden II)}} | | {{GetS2enemies|location=[[Sindar Ruins]]}} |
| {{Enemies list row|Mega Watt|14|150|300|[[Leather Armor]]<br>[[Green Salad]] ×5}}
| |
| {{Enemies list row|Mr. Venus|16|270|400|[[Titan Rune]]<br>[[Unicorn Rune]]}}
| |
| {{Enemies list row|Nightmare|13|90|250|[[Antitoxin]] ×4|Nightmare (Suikoden II)|Nightmare (Suikoden II)}}
| |
| {{Enemies list row|Salamander|15|200|4000|[[Fire Lizard Rune]]|Salamander|Salamander (Suikoden II)}}
| |
| {{Enemies list row|Double Head|25|2500|4000|[[Spark Rune]]}}
| |
|
| |
|
| {{Location enemies|Muse-Highland Border}}
| | ===Muse-Highland Checkpoint=== |
| {{Enemies list row|Armadilloid|25|70|7000|[[Defective Urn]]<br>[[Flower Vase]]<br>[[Blue Dragon Urn]]}} | | {{GetS2enemies|location=[[Muse-Highland Checkpoint]]}} |
| {{Enemies list row|Armadillon|18|120|350|[[Chest Plate]]}}
| |
| {{Enemies list row|Killer Bunny|19|170|300|[[Belt of Strength]]|Killer Bunny (S2 PS1 enemy)|Killer Bunny (Suikoden II)}}
| |
| {{Enemies list row|Highland Soldier|19|90|150|[[Shoulder Pads]]|Highland Soldier}}
| |
| {{Enemies list row|Highland Soldier|19|110|150|[[Silence Rune]]|Highland Soldier (spear)}}
| |
| {{Enemies list row|Highland Soldier|19|80|150|[[Medicine]] ×6|Highland Soldier (bow)}}
| |
|
| |
|
| {{Location enemies|Muse City}}
| | ===Muse City=== |
| {{Enemies list row|Highland Soldier|19|80|150|[[Wooden Shield]]<br>[[Obento]] ×5|Highland Soldier}} | | {{GetS2enemies|location=[[Muse City]]}} |
| {{Enemies list row|Highland Soldier|19|100|150|[[Medicine]] ×4|Highland Soldier (spear)}}
| |
| {{Enemies list row|Highland Soldier|19|70|150|[[Great Hawk Rune]]|Highland Soldier (bow)}}
| |
| {{Enemies list row|Commander|22|120|400|[[Circlet]]}}
| |
|
| |
|
| {{Location enemies|Area C (South Window Principality)}}
| | ===Area C (South Window Principality)=== |
| {{Enemies list row|Black Bunny|19|120|350|[[Shoulder Pads]]}} | | {{GetS2enemies|location=[[South Window Principality]]}} |
| {{Enemies list row|Flying Squirrel|18|75|150|[[Medicine]] ×6<br>[[Celadon Urn]]<br>[[Medicine Rune]]|Flying Squirrel (Suikoden II)|Flying Squirrel (Suikoden II)}}
| |
| {{Enemies list row|Target Lady|20|130|600|[[Dryad Rune]]<br>[[Nymph Rune]]<br>[[Pixie Rune]]}}
| |
|
| |
|
| {{Location enemies|North Window Castle}}
| | ===North Window=== |
| {{Enemies list row|Zombie|22|130|90|N/A|Zombie A (Suikoden II)}} | | {{GetS2enemies|location=[[North Window]]}} |
| {{Enemies list row|Zombie|22|150|110|[[Hex Doll]]|Zombie B (Suikoden II)}}
| |
| {{Enemies list row|Neclord|35|20000|70000|N/A|Neclord (Suikoden II enemy)|Neclord (Suikoden II)}}
| |
|
| |
|
| {{Location enemies|Cave of the Wind}}
| | ===Cave of the Wind=== |
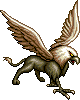
| {{Enemies list row|Griffin|21|135|500|[[Wind Rune|Wind Orb]]<br>[[Wind Hat]]|Griffin|Griffin (Suikoden II enemy)}} | | {{GetS2enemies|location=[[Cave of the Wind]]}} |
| {{Enemies list row|Minos|23|170|500|[[Mega Medicine]] ×3<br>[[Gozu Rune|Gozu Orb]]<br>[[Grilled Beef]] ×3}}
| |
| {{Enemies list row|Sorcerer|22|110|450|[[Escape Talisman]]|Sorcerer (Suikoden II)|Sorcerer (Suikoden II)}}
| |
| {{Enemies list row|Sun King|24|350|700|[[Wall Rune|Wall Orb]]|Sun King (S2 PS1 sprite)|Sun King (Suikoden II)}}
| |
| {{Enemies list row|Celestial Sword|32|2500|0|N/A|Celestial Sword (S2 PS1 enemy)|Celestial Sword (Suikoden II enemy)}}
| |
|
| |
|
| {{Location enemies|North Window Castle 2}}
| | ===North Window Castle=== |
| {{Enemies list row|Shadow Man|25|220|300|[[Antitoxin]] ×4|Shadow Man (Suikoden II)|Shadow Man (Suikoden II)}} | | {{GetS2enemies|location=[[North Window Castle]]}} |
| {{Enemies list row|Sorcerer|26|170|100|[[Fish Badge]]|Sorcerer (Suikoden II)|Sorcerer (Suikoden II)}}
| |
| {{Enemies list row|Zombie|24|140|100|[[Defective Urn]]|Zombie A (Suikoden II)}}
| |
| {{Enemies list row|Zombie|24|160|120|[[Hex Doll]]<br>[[Half Helmet]]|Zombie B (Suikoden II)}}
| |
| {{Enemies list row|Abomination|34|4500|10000|N/A}}
| |
|
| |
|
| {{Location enemies|Area D (Two River Principality)}}
| | ===Area D (Two River Principality)=== |
| {{Enemies list row|Rockadillo|26|140|550|[[Turtle Plans #1]]}} | | {{GetS2enemies|location=[[Two River Principality]]}} |
| {{Enemies list row|Sandillo|33|120|15000|[[Japanese Dish]]<br>[[Chinese Dish]]<br>[[Peeing Boy]]}}
| |
| {{Enemies list row|Spikebeak|27|180|600|[[Mega Medicine]] ×4<br>[[Balance Rune|Balance Orb]]}}
| |
|
| |
|
| {{Location enemies|Two River Sewers}}
| | ===Two River Sewers=== |
| {{Enemies list row|Devil Eye|28|150|600|[[Kite Rune|Kite Orb]]}} | | {{GetS2enemies|location=[[Two River Sewers]]}} |
| {{Enemies list row|Land Shark|28|110|800|[[Grilled Fish|Recipe #21]]<br>[[Guard Ring]]<br>[[Dried Fish]] ×5}}
| |
| {{Enemies list row|Shadow|29|130|900|[[Throat Drop]] ×4<br>[[Main-Gauche]]|Shadow (Suikoden II)|Shadow (Suikoden II)}}
| |
| {{Enemies list row|Siren|27|110|800|[[Banshee Rune|Banshee Orb]]<br>[[Water Amulet]]|Siren (Suikoden II)|Siren (Suikoden II)}}
| |
| {{Enemies list row|Pest Rat|40|5200|20000|[[Poison Rune|Poison Orb]]}}
| |
|
| |
|
| {{Location enemies|Two River City}}
| | ===Two River City=== |
| {{Enemies list row|Highland Soldier|32|120|500|[[Iron Shield]]|Highland Soldier sword green (S2 PS1 enemy)}} | | {{GetS2enemies|location=[[Two River City]]}} |
| {{Enemies list row|Highland Soldier|32|110|500|[[Chain Mail]]|Highland Soldier spear green (S2 PS1 enemy)}}
| |
| {{Enemies list row|Highland Soldier|32|95|500|[[Medicine]] ×6|Highland Soldier bow green (S2 PS1 enemy)}}
| |
| {{Enemies list row|Commander|34|170|700|[[Mega Medicine]] ×3}}
| |
|
| |
|
| {{Location enemies|Kobold Forest}}
| | ===Kobold Forest=== |
| {{Enemies list row|Eagle Man|32|180|1100|[[Sandwich|Recipe #12]]<br>[[Double-Strike Rune]]<br>[[Sandwich]] x4|Eagle Man|Eagle Man (Suikoden II)}} | | {{GetS2enemies|location=[[Kobold Village Forest]]}} |
| {{Enemies list row|Mirage|31|220|800|[[Fire Emblem]]|Mirage (Suikoden II)|Mirage (Suikoden II)}}
| |
|
| |
|
| {{Location enemies|Area E (Greenhill Principality)}}
| | ===Area E (Greenhill Principality)=== |
| {{Enemies list row|Holly Boy|15|45|100|[[Needle]] ×3<br>[[Spinach Juice]] ×4|Holly Boy (Suikoden II)|Holly Boy (Suikoden II)}} | | {{GetS2enemies|location=[[Greenhill Principality]]}} |
| {{Enemies list row|Ragged One|29|165|5|[[Turtle Plans #2]]<br>[[Chick (bath item)|Chick]]<br>[[Knight Statue]]}}
| |
| {{Enemies list row|Sauroid|30|200|600|[[Protection Mist Scroll]] ×1<br>[[Sweet & Sour Fish]] ×4}}
| |
|
| |
|
| {{Location enemies|Greenhill City}}
| | ===Greenhill Forest=== |
| {{Enemies list row|Holly Boy|15|45|100|[[Medicine]] ×3<br>[[Spinach Juice]] ×4|Holly Boy (Suikoden II)|Holly Boy (Suikoden II)}} | | {{GetS2enemies|location=[[Greenhill Forest]]}} |
| {{Enemies list row|Holly Elf|32|170|1200|[[Toe Shoes]]<br>[[Dryad Rune|Dryad Orb]]}}
| |
| {{Enemies list row|Melonzoo|31|167|750|[[Viper Rune|Viper Orb]]}}
| |
| {{Enemies list row|Monwer|32|90|800|[[Needle]] ×4}}
| |
| {{Enemies list row|Highland Soldier|33|130|700|[[Head Gear]]<br>[[Fire Wall Scroll]]|Highland Soldier}}
| |
| {{Enemies list row|Highland Soldier|33|120|700|[[Medicine]] ×6<br>[[Scale Mail]]|Highland Soldier (spear)}}
| |
| {{Enemies list row|Highland Soldier|33|110|700|[[Fur Cape]]|Highland Soldier (bow)}}
| |
|
| |
|
| {{Location enemies|Road to Matilda}}
| | ===Road to Matilda=== |
| {{Enemies list row|DoReMi Elf|33|230|900|[[Sound Set (Suikoden II)|Sound Set #2]]|DoReMi Elf blue (Suikoden II)|DoReMi Elf (Suikoden II)}} | | {{GetS2enemies|location=[[Road to Matilda]]}} |
| {{Enemies list row|DoReMi Elf|33|230|900|[[Sound Set (Suikoden II)|Sound Set #2]]|DoReMi Elf red (Suikoden II)|DoReMi Elf (Suikoden II)}}
| |
| {{Enemies list row|DoReMi Elf|33|230|900|[[Sound Set (Suikoden II)|Sound Set #2]]|DoReMi Elf yellow (Suikoden II)|DoReMi Elf (Suikoden II)}}
| |
| {{Enemies list row|DoReMi Elf|33|230|900|[[Sound Set (Suikoden II)|Sound Set #2]]|DoReMi Elf green (Suikoden II)|DoReMi Elf (Suikoden II)}}
| |
| {{Enemies list row|DoReMi Elf|33|230|900|[[Sound Set (Suikoden II)|Sound Set #2]]|DoReMi Elf pink (Suikoden II)|DoReMi Elf (Suikoden II)}}
| |
| {{Enemies list row|DoReMi Elf|33|230|900|[[Sound Set (Suikoden II)|Sound Set #2]]|DoReMi Elf aqua (Suikoden II)|DoReMi Elf (Suikoden II)}}
| |
| {{Enemies list row|Holly Boy|15|45|100|[[Drinking Set]]<br>[[Medicine]] ×4<br>[[Spinach Juice]] x4|Holly Boy (Suikoden II)|Holly Boy (Suikoden II)}}
| |
| {{Enemies list row|Papa Holly|32|650|1300|[[Seed Potato]]<br>[[Heavy Collar]]<br>[[Canopy Defense Scroll]] ×1}}
| |
| {{Enemies list row|Zombie Slug|33|320|1000|[[Grilled Beef|Recipe #29]]<br>[[Lightning Amulet]]}}
| |
|
| |
|
| {{Location enemies|Forest Village}}
| | ===Forest Village=== |
| {{Enemies list row|Griffin|32|370|1200|[[Shredding Wind Scroll]] ×1|Griffin|Griffin (Suikoden II enemy)}} | | {{GetS2enemies|location=[[Forest Village]]}} |
|
| |
|
| {{Location enemies|Area F (Matilda Knightdom)}}
| | ===Area F (Matilda Knightdom)=== |
| {{Enemies list row|Phantom|35|250|1500|[[Healing Wind Scroll]] ×3|Phantom (Suikoden II)|Phantom (Suikoden II)}} | | {{GetS2enemies|location=[[Matilda Knightdom]]}} |
| {{Enemies list row|Pink Bird|34|210|2000|[[Sylph Rune|Sylph Orb]]<br>[[Skunk Rune|Skunk Orb]]}}
| |
|
| |
|
| {{Location enemies|Rakutei Mountain}}
| | ===Rakutei Mountain=== |
| {{Enemies list row|Assassin|35|140|1100|[[Escape Talisman]]}} | | {{GetS2enemies|location=[[Rakutei Mountain]]}} |
| {{Enemies list row|Hawk Man|37|260|1400|[[Turtle Plans #3]]<br>[[Great Hawk Rune]]|Hawk Man (Suikoden II)|Hawk Man (Suikoden II)}}
| |
| {{Enemies list row|Pixie|36|60|2000|[[Antitoxin]] ×6<br>[[Pixie Rune|Pixie Orb]]}}
| |
| {{Enemies list row|Spiker|34|120|1200|[[Defective Urn]]<br>[[Wide Urn]]<br>[[Black Urn]]}}
| |
| {{Enemies list row|Harpy|45|7400|40000|N/A}}
| |
|
| |
|
| {{Location enemies|Area B (Muse Principality) 2}}
| | ===Area B (Muse Principality)=== |
| {{Enemies list row|Clock Knight|35|160|3000|[[Mega Medicine]] ×4}} | | {{GetS2enemies|location=[[Muse Principality]] (Chapter 6)}} |
| {{Enemies list row|White Tiger|35|230|3000|[[Double-Jab Rune|Double-Jab Orb]]}}
| |
|
| |
|
| {{Location enemies|Muse City 2}}
| | ===Muse City=== |
| {{Enemies list row|Highland Soldier|36|180|900|[[Half Helmet]]|Highland Soldier sword green (S2 PS1 enemy)}} | | {{GetS2enemies|location=[[Muse City]] (Chapter 6)}} |
| {{Enemies list row|Highland Soldier|36|180|900|[[Scale Mail]]|Highland Soldier spear green (S2 PS1 enemy)}}
| |
| {{Enemies list row|Highland Soldier|36|160|900|[[Mega Medicine]] ×4|Highland Soldier bow green (S2 PS1 enemy)}}
| |
|
| |
|
| {{Location enemies|Banner Pass}}
| | ===Banner Pass=== |
| {{Enemies list row|RanRan|36|140|2000|[[Medicine]] ×6<br>[[Ninja Garb]]|RanRan (S2 PS1 enemy)|RanRan (Suikoden II enemy)}} | | {{GetS2enemies|location=[[Banner Pass]]}} |
| {{Enemies list row|RinRin|36|150|2300|[[Barrier Rune]]<br>[[Diet Lunch]] ×5|RinRin (S2 PS1 enemy)|RinRin (Suikoden II enemy)}}
| |
| {{Enemies list row|TenTen|36|130|1500|[[Ninja Garb]]|TenTen (S2 PS1 enemy)|TenTen (Suikoden II enemy)}}
| |
| {{Enemies list row|Samurai|38|259|2500|[[Hex Doll]]<br>[[Chinese Dish]]<br>[[Bonsai Tree]]}}
| |
| {{Enemies list row|Tiger|37|180|3500|[[Window Set (Suikoden II)|Window Set #1]]}}
| |
| {{Enemies list row|Worm|44|4200|35000|N/A}}
| |
| {{Enemies list row|Worm|44|2800|0|N/A}}
| |
| {{Enemies list row|Poison Moth|47|6800|50000|N/A}}
| |
|
| |
|
| {{Location enemies|Battle with Luca}}
| | ===Battle with Luca=== |
| {{Enemies list row|White Wolf Soldier|39|190|2000|[[Thunder Runner Scroll]] ×1|White Wolf Soldier (Sword)}} | | {{GetS2enemies|location=Battle with Luca}} |
| {{Enemies list row|White Wolf Soldier|39|205|2000|[[Mega Medicine]] ×3|White Wolf Soldier (Spear)}}
| |
| {{Enemies list row|Luca Blight|54|6500|15000|N/A|Luca Blight (sprite)|Luca Blight (enemy)}}
| |
|
| |
|
| {{Location enemies|Muse City 3}}
| | ===Muse City=== |
| {{Enemies list row|Highland Soldier|41|180|1300|[[Iron Shield]]|Highland Soldier sword green (S2 PS1 enemy)}} | | {{GetS2enemies|location=[[Muse City]] (Chapter 8)}} |
| {{Enemies list row|Highland Soldier|41|187|1300|[[Full Plate]]|Highland Soldier spear green (S2 PS1 enemy)}}
| |
| {{Enemies list row|Highland Soldier|41|170|1300|N/A|Highland Soldier bow green (S2 PS1 enemy)}}
| |
| {{Enemies list row|Commander|43|220|1500|[[Mega Medicine]] ×3}}
| |
|
| |
|
| {{Location enemies|Lampdragon Mountain}}
| | ===Lampdragon Mountain=== |
| {{Enemies list row|Air Lizard|42|350|2000|[[Window Set (Suikoden II)|Window Set #2]]<br>[[Firefly Rune|Firefly Orb]]}} | | {{GetS2enemies|location=[[Lampdragon Mountain]]}} |
| {{Enemies list row|Killer Dog|41|180|1800|[[Antitoxin]] ×4<br>[[Chaos Shield]]}}
| |
| {{Enemies list row|Zombie|42|140|281|[[Defective Urn]]|Zombie A red (S2 PS1 enemy)}}
| |
| {{Enemies list row|Zombie|42|155|323|[[Hex Doll]]<br>[[Silver Necklace]]|Zombie B red (S2 PS1 enemy)}}
| |
|
| |
|
| {{Location enemies|Area G (Tinto Principality)}}
| | ===Area G (Tinto Principality)=== |
| {{Enemies list row|Ghost Slug|40|450|3000|[[Dancing Flames Scroll]] ×1}} | | {{GetS2enemies|location=[[Tinto Principality]]}} |
| {{Enemies list row|Skeleton|39|170|652|[[Iron Shield]]|Skeleton|Skeleton (Suikoden II)}}
| |
| {{Enemies list row|Skeleton|39|178|730|[[Gauntlet]]|Skeleton (spear)|Skeleton (Suikoden II)}}
| |
|
| |
|
| {{Location enemies|Tinto Mines}}
| | ===Tinto Mines=== |
| {{Enemies list row|Zombie|42|130|290|[[Defective Urn]]<br>[[Escape Talisman]]|Zombie A red (S2 PS1 enemy)}} | | {{GetS2enemies|location=[[Tinto Mines]] (Chapter 8)}} |
| {{Enemies list row|Zombie|42|140|332|[[Hex Doll]]|Zombie B red (S2 PS1 enemy)}}
| |
| {{Enemies list row|Neclord|50|20000|0|N/A|Neclord (Suikoden II enemy)|Neclord (Suikoden II)}}
| |
|
| |
|
| {{Location enemies|Tigermouth Village}}
| | ===Tigermouth Village=== |
| {{Enemies list row|Zombie|42|150|340|[[Defective Urn]]|Zombie A red (S2 PS1 enemy)}} | | {{GetS2enemies|location=[[Tigermouth Village]]}} |
| {{Enemies list row|Zombie|42|150|340|[[Hex Doll]]|Zombie B red (S2 PS1 enemy)}}
| |
| {{Enemies list row|Sierra|47|2800|0|N/A|Sierra (sprite)|Sierra (enemy)}}
| |
|
| |
|
| {{Location enemies|Crom Village}}
| | ===Crom Village=== |
| {{Enemies list row|Zombie|41|140|339|[[Defective Urn]]|Zombie A red (S2 PS1 enemy)}} | | {{GetS2enemies|location=[[Crom Village]]}} |
| {{Enemies list row|Zombie|41|160|347|[[Hex Doll]]|Zombie B red (S2 PS1 enemy)}}
| |
|
| |
|
| {{Location enemies|Tinto Mines 2}}
| | ===Tinto Mines=== |
| {{Enemies list row|Neclordia|45|320|3500|[[Hex Doll]]<br>[[Master's Garb]]<br>[[Knight Statue]]}} | | {{GetS2enemies|location=[[Tinto Mines]] (Chapter 9)}} |
| {{Enemies list row|Skeleton|44|200|573|[[Iron Shield]]|Skeleton|Skeleton (Suikoden II)}}
| |
| {{Enemies list row|Skeleton|44|208|765|[[Gauntlet]]|Skeleton (spear)|Skeleton (Suikoden II)}}
| |
| {{Enemies list row|Zombie Unicorn|46|570|4000|[[Fire Sealing Rune|Fire Sealing Orb]]}}
| |
| {{Enemies list row|Zombie|42|130|290|[[Defective Urn]]<br>[[Escape Talisman]]|Zombie A red (S2 PS1 enemy)}}
| |
| {{Enemies list row|Zombie|42|140|332|[[Hex Doll]]|Zombie B red (S2 PS1 enemy)}}
| |
| {{Enemies list row|Stone Golem|55|7500|50000|N/A}}
| |
|
| |
|
| {{Location enemies|Tinto City}}
| | ===Tinto City=== |
| {{Enemies list row|Zombie|45|210|377|[[Defective Urn]]|Zombie A red (S2 PS1 enemy)}} | | {{GetS2enemies|location=[[Tinto City]]}} |
| {{Enemies list row|Zombie|45|230|354|[[Hex Doll]]|Zombie B red (S2 PS1 enemy)}}
| |
| {{Enemies list row|Neclord|50|4500|70000|[[Shredding Wind Scroll]] ×4|Neclord (Suikoden II enemy)|Neclord (Suikoden II)}}
| |
|
| |
|
| {{Location enemies|Headquarters}}
| | ===Headquarters=== |
| {{Enemies list row|Lucia|49|1500|20000|N/A|Lucia (Suikoden II enemy)|Lucia (Suikoden II)}} | | {{GetS2enemies|location=[[New Alliance Army Headquarters]]}} |
|
| |
|
| {{Location enemies|Area E (Greenhill Principality) 2}}
| | ===Area E (Greenhill Principality)=== |
| {{Enemies list row|Eye Flower|45|260|3500|[[Medicine]] ×7<br>[[Spinach Seedling]]}} | | {{GetS2enemies|location=[[Greenhill Principality]] (Chapter 9)}} |
| {{Enemies list row|Kookaburra|47|300|5000|[[Guard Ring]]}}
| |
|
| |
|
| {{Location enemies|Greenhill Forest 2}}
| | ===Greenhill Forest=== |
| {{Enemies list row|DoReMi Elf|46|270|900|[[Throat Drop]] ×8<br>[[Japanese Stew|Recipe #34]]<br>[[Japanese Stew]] ×6|DoReMi Elf blue (Suikoden II)|DoReMi Elf (Suikoden II)}} | | {{GetS2enemies|location=[[Greenhill Forest]] (Chapter 9)}} |
| {{Enemies list row|DoReMi Elf|46|270|900|[[Throat Drop]] ×8<br>[[Japanese Stew|Recipe #34]]<br>[[Japanese Stew]] ×6|DoReMi Elf red (Suikoden II)|DoReMi Elf (Suikoden II)}}
| |
| {{Enemies list row|DoReMi Elf|46|270|900|[[Throat Drop]] ×8<br>[[Japanese Stew|Recipe #34]]<br>[[Japanese Stew]] ×6|DoReMi Elf yellow (Suikoden II)|DoReMi Elf (Suikoden II)}}
| |
| {{Enemies list row|DoReMi Elf|46|270|900|[[Throat Drop]] ×8<br>[[Japanese Stew|Recipe #34]]<br>[[Japanese Stew]] ×6|DoReMi Elf green (Suikoden II)|DoReMi Elf (Suikoden II)}}
| |
| {{Enemies list row|DoReMi Elf|46|270|900|[[Throat Drop]] ×8<br>[[Japanese Stew|Recipe #34]]<br>[[Japanese Stew]] ×6|DoReMi Elf pink (Suikoden II)|DoReMi Elf (Suikoden II)}}
| |
| {{Enemies list row|DoReMi Elf|46|270|900|[[Throat Drop]] ×8<br>[[Japanese Stew|Recipe #34]]<br>[[Japanese Stew]] ×6|DoReMi Elf aqua (Suikoden II)|DoReMi Elf (Suikoden II)}}
| |
| {{Enemies list row|Holly Boy|30|83|800|[[Toy Boat]]<br>[[Spinach Juice]] ×4|Holly Boy (Suikoden II)|Holly Boy (Suikoden II)}}
| |
| {{Enemies list row|Holly Master|47|260|4000|[[Rain of Kindness Scroll]] ×1<br>[[Dryad Rune|Dryad Orb]]|Holly Master (S2 PS1 enemy)|Holly Master (Suikoden II)}}
| |
| {{Enemies list row|Grand Holly|49|1020|5500|[[Cape of Darkness]]|Grand Holly|Grand Holly (Suikoden II)}}
| |
| {{Enemies list row|Target Girl|48|270|4000|[[Waking Rune|Waking Orb]]<br>[[Nymph Rune|Nymph Orb]]<br>[[Pixie Rune|Pixie Orb]]}}
| |
| {{Enemies list row|Highland Soldier|47|270|2000|[[Medicine]] ×6|Highland Soldier}}
| |
| {{Enemies list row|Highland Soldier|47|280|2000|[[Iron Boots]]|Highland Soldier (spear)}}
| |
| {{Enemies list row|Highland Soldier|47|260|2000|N/A|Highland Soldier (bow)}}
| |
| {{Enemies list row|Commander|49|380|2500|[[Full Helmet]]}}
| |
| {{Enemies list row|Karayan Soldier|49|350|1000|N/A|Karayan Soldier A}}
| |
| {{Enemies list row|Karayan Soldier|49|350|1000|N/A|Karayan Soldier B}}
| |
| {{Enemies list row|Karayan Soldier|49|350|1000|N/A|Karayan Soldier C}}
| |
| {{Enemies list row|Lucia|54|4700|30000|[[Blue Gate Rune]]|Lucia (Suikoden II enemy)|Lucia (Suikoden II)}}
| |
|
| |
|
| {{Location enemies|Greenhill City 2}}
| | ===Greenhill City=== |
| {{Enemies list row|Bone Dragon|56|8900|100000|N/A}} | | {{GetS2enemies|location=[[Greenhill City]] (Chapter 9)}} |
|
| |
|
| {{Location enemies|Muse City Hall}}
| | ===Muse City=== |
| {{Enemies list row|Golden Wolf|49|3500|10000|N/A|Golden Wolf|Golden Wolf (Suikoden II)}} | | {{GetS2enemies|location=[[Muse City]] (Chapter 9)}} |
|
| |
|
| {{Location enemies|Area B (Muse Principality) 3}}
| | ===Area B (Muse Principality)=== |
| {{Enemies list row|Copper Sun|51|600|7000|[[Rage Rune|Rage Orb]]|Copper Sun|Copper Sun (Suikoden II)}} | | {{GetS2enemies|location=[[Muse Principality]] (Chapter 9)}} |
| {{Enemies list row|Fisheye|48|230|5500|[[Protection Mist Scroll]]}}
| |
| {{Enemies list row|Iron Moon|50|440|7000|[[Graffiti]]<br>[[Flower Painting]]<br>[[Landscape Scroll]]|Iron Moon|Iron Moon}}
| |
|
| |
|
| {{Location enemies|Area F (Matilda Knightdom) 2}}
| | ===Area F (Matilda Knightdom)=== |
| {{Enemies list row|Black Tiger|52|420|15000|[[Full Helmet]]}} | | {{GetS2enemies|location=[[Matilda Knightdom]] (Chapter 10)}} |
| {{Enemies list row|Fei Yu|50|280|5000|[[Diet Lunch]] ×5<br>[[Gold Bar]]}}
| |
| {{Enemies list row|Li Lan|50|320|5300|[[Mega Medicine]] ×5<br>[[Antitoxin]] ×4}}
| |
| {{Enemies list row|Shiu Lin|50|250|4100|[[Flowing Rune|Flowing Orb]]}}
| |
|
| |
|
| {{Location enemies|Rockaxe Castle}}
| | ===Rockaxe Castle=== |
| {{Enemies list row|Cockatrice|52|440|6000|[[Thunder Rune|Thunder Orb]]}} | | {{GetS2enemies|location=[[Rockaxe Castle]]}} |
| {{Enemies list row|Hippogriff|53|360|9000|[[Wind Amulet]]}}
| |
| {{Enemies list row|Matilda Knight|53|410|7000|[[Master's Robe]]<br>[[Knight Rune|Knight Orb]]|Matilda Knight (enemy)|Matilda Knight (enemy)}}
| |
| {{Enemies list row|Highland Soldier|51|280|3500|[[Hex Doll]]<br>[[Chinese Dish]]<br>[[Knight Statue]]|Highland Soldier}}
| |
| {{Enemies list row|Highland Soldier|51|290|3500|[[Escape Talisman]]|Highland Soldier (spear)}}
| |
| {{Enemies list row|Highland Soldier|51|270|3500|[[Jingisukan|Recipe #36]]<br>[[Jingisukan]] ×8|Highland Soldier (bow)}}
| |
| {{Enemies list row|Commander|52|350|5000|[[Chaos Shield]]}}
| |
| {{Enemies list row|Gordeau|59|4500|90000|[[Knight Armor]]|Gordeau (sprite)|Gordeau (enemy)}}
| |
|
| |
|
| {{Location enemies|Rakutei Mountain 2}}
| | ===Rakutei Mountain=== |
| {{Enemies list row|Iron Claw|54|320|9000|[[Medicine]] ×8|Iron Claw}} | | {{GetS2enemies|location=[[Rakutei Mountain]] (Chapter 10)}} |
| {{Enemies list row|Leathercut|53|220|6500|[[Defective Urn]]<br>[[Blue Dragon Urn]]<br>[[Fine China]]}}
| |
| {{Enemies list row|Pixie|55|130|30000|[[Pixie Rune|Pixie Orb]]}}
| |
| {{Enemies list row|Sky Knight|52|270|8000|[[Turtle Plans #3]]}}
| |
| {{Enemies list row|Harpy|60|12000|150000|N/A}}
| |
|
| |
|
| {{Location enemies|Area J (Highland)}}
| | ===Area J (Highland)=== |
| {{Enemies list row|Colossus|58|1500|15000|[[Full Helmet]]|Colossus (Suikoden II)|Colossus (Suikoden II)}}
| | {{GetS2enemies|location=Outside [[L'Renouille]]}} |
| {{Enemies list row|Minotaurus|54|280|13000|[[Spicy Stew]] ×6<br>[[Mother Earth Rune|Mother Earth Orb]]}} | |
|
| |
|
| {{Location enemies|Tenzan Pass 2}}
| | ===Tenzan Pass=== |
| {{Enemies list row|Chimera|55|765|19000|[[Cyclone Rune|Cyclone Orb]]|Chimera (Suikoden II)|Chimera (Suikoden II)}} | | {{GetS2enemies|location=[[Tenzan Pass]] (Chapter 10)}} |
| {{Enemies list row|Magus|54|330|15000|[[Wind Amulet]]|Magus (Suikoden II)|Magus (Suikoden II)}}
| |
| {{Enemies list row|Minotaurus|54|300|13000|[[Graffiti]]<br>[[Lovers' Garden]]<br>[[Beauties of Nature]]}}
| |
|
| |
|
| {{Location enemies|L'Renouille Palace}}
| | ===L'Renouille Palace=== |
| {{Enemies list row|Bronzem|58|1700|20000|[[Master's Garb]]}} | | {{GetS2enemies|location=[[L'Renouille Palace]]}} |
| {{Enemies list row|Chimera|55|750|17000|[[Lucky Ring]]<br>[[Blood Armor]]|Chimera (Suikoden II)|Chimera (Suikoden II)}}
| |
| {{Enemies list row|Magus|56|350|14000|[[Hex Doll]]<br>[[Peeing Boy]]<br>[[Goddess Statue]]|Magus (Suikoden II)|Magus (Suikoden II)}}
| |
| {{Enemies list row|Highland Soldier|54|290|10000|N/A|Highland Soldier}}
| |
| {{Enemies list row|Highland Soldier|54|310|10000|[[Escape Talisman]]|Highland Soldier (spear)}}
| |
| {{Enemies list row|Highland Soldier|54|285|10000|N/A|Highland Soldier (bow)}}
| |
| {{Enemies list row|Commander|56|370|15000|[[Mega Medicine]] ×7<br>[[Flame Helmet]]}}
| |
| {{Enemies list row|Lucia|58|6500|50000|[[Mother Earth Rune|Mother Earth Orb]]|Lucia (Suikoden II enemy)|Lucia (Suikoden II)}}
| |
| {{Enemies list row|Culgan|65|3800|70000|[[Bolt of Wrath Scroll]]<br>[[Thunder Rune|Thunder Orb]]|Culgan (enemy)}}
| |
| {{Enemies list row|Seed|65|4200|60000|[[Rage Rune|Rage Orb]]|Seed (enemy)}}
| |
| {{Enemies list row|Silver Wolf (Rune)|75|3300|200000|N/A|Silver Wolf (rune)|Silver Wolf}}
| |
| {{Enemies list row|Silver Wolf (Left Head)|75|4800|200000|N/A|Silver Wolf (left head)|Silver Wolf}}
| |
| {{Enemies list row|Silver Wolf (Right Head)|75|4800|200000|N/A|Silver Wolf (right head)|Silver Wolf}}
| |
| {{Enemies list row|Silver Wolf (Left Leg)|75|4500|200000|N/A|Silver Wolf (left leg)|Silver Wolf}}
| |
| {{Enemies list row|Silver Wolf (Right Leg)|75|5700|200000|N/A|Silver Wolf (right leg)|Silver Wolf}}
| |
| | |
| {{Location enemies footer}}
| |
|
| |
|
| {{Navbox S2}}{{Short description|Table of all enemies the player can encounter in Suikoden II}} | | {{Navbox S2}}{{Short description|Table of all enemies the player can encounter in Suikoden II}} |
| [[Category:Suikoden II]] | | [[Category:Suikoden II]] |
| [[Category:Suikoden I&II HD Remaster]] | | [[Category:Suikoden I&II HD Remaster]] |

.png)
.png)
.png)
.png)
.png)
.png)
.png)
.png)
.png)
.png)
.png)
.png)
.png)
.png)
.png)
.png)
.png)
.png)
.png)
.png)
.png)
.png)
.png)
.png)
.png)
.png)
.png)
.png)
.png)
.png)
.png)
.png)
.png)
.png)
.png)
.png)
.png)
.png)
.png)
.png)
.png)
.png)
.png)
.png)
.png)
.png)
.png)
.png)
.png)
.png)
.png)
.png)
.png)
.png)
.png)
.png)
.png)
.png)
.png)
.png)
.png)
.png)
.png)
.png)
.png)
.png)
.png)
.png)
.png)
.png)
.png)
.png)
.png)
.png)
.png)
.png)
.png)
.png)
.png)
.png)
.png)
.png)
.png)
.png)
.png)
.png)
.png)
.png)
.png)
.png)
.png)
.png)
.png)
.png)
.png)
.png)
.png)
.png)
.png)
.png)
.png)
.png)
.png)
.png)
.png)
.png)
.png)
.png)
.png)
.png)
.png)
.png)
.png)
.png)
.png)
.png)
.png)
.png)
.png)
.png)
.png)
.png)
.png)
.png)
.png)
.png)
.png)
.png)
.png)
.png)
.png)
.png)
.png)
.png)
.png)
.png)
.png)
.png)
.png)
.png)
.png)
.png)
.png)
.png)
.png)