
Enemies (Suikoden II): Difference between revisions
Table of all enemies the player can encounter in Suikoden II
More actions
mNo edit summary |
|||
| (25 intermediate revisions by 4 users not shown) | |||
| Line 1: | Line 1: | ||
In [[Suikoden II]], players encounter a diverse range of '''enemies''', each with unique abilities, attack patterns, and weaknesses. This list details all hostile creatures, bosses, and adversaries found throughout the game, detailing their level, HP, potch, and item drops. Each enemy also has a more detailed page with full stats, attacks, and weaknesses. | In [[Suikoden II]], players encounter a diverse range of '''enemies''', each with unique abilities, attack patterns, and weaknesses. This list details all hostile creatures, bosses, and adversaries found throughout the game, detailing their level, HP, potch, and item drops. Each enemy also has a more detailed page with full stats, attacks, and weaknesses. | ||
==Difficulties== | |||
Introduced in [[Suikoden I&II HD Remaster]], there are two additional difficulty levels that adjust enemy HP. | |||
'''Easy''' mode multiplies enemy HP by 0.8x. | |||
'''Hard''' mode multiplies enemy HP by 1.2x. | |||
==Enemy list== | ==Enemy list== | ||
===Tenzan Pass=== | |||
{{ | {{GetS2enemies|location=[[Tenzan Pass]]}} | ||
===Area A (East Muse Principality)=== | |||
{{GetS2enemies|location=Eastern [[Muse Principality]]}} | |||
{{ | |||
===North Swallow Pass=== | |||
{{ | {{GetS2enemies|location=[[North Swallow Pass]]}} | ||
===Area J (Kyaro Town area)=== | |||
{{ | {{GetS2enemies|location=Outside [[Kyaro Town]]}} | ||
===Kyaro Town=== | |||
{{ | {{GetS2enemies|location=[[Kyaro Town]]}} | ||
===Area A (East Muse Principality)=== | |||
{{GetS2enemies|location=Eastern [[Muse Principality]] (Chapter 2)}} | |||
{{ | |||
===Ryube Forest=== | |||
{{GetS2enemies|location=[[Ryube Forest]]}} | |||
{{ | |||
===Mercenary Fortress=== | |||
{{GetS2enemies|location=[[Mercenary Fortress]]}} | |||
{{ | |||
===Area B (Muse Principality)=== | |||
{{GetS2enemies|location=[[Muse Principality]] ''(early game)''}} | |||
{{ | |||
===Sindar Ruins=== | |||
{{GetS2enemies|location=[[Sindar Ruins]]}} | |||
{{ | |||
===Muse-Highland Checkpoint=== | |||
{{GetS2enemies|location=[[Muse-Highland Checkpoint]]}} | |||
{{ | |||
===Muse City=== | |||
{{ | {{GetS2enemies|location=[[Muse City]]}} | ||
===Area C (South Window Principality)=== | |||
{{GetS2enemies|location=[[South Window Principality]]}} | |||
{{ | |||
===North Window=== | |||
{{GetS2enemies|location=[[North Window]]}} | |||
{{ | |||
===Cave of the Wind=== | |||
{{ | {{GetS2enemies|location=[[Cave of the Wind]]}} | ||
===North Window Castle=== | |||
{{GetS2enemies|location=[[North Window Castle]]}} | |||
{{ | |||
===Area D (Two River Principality)=== | |||
{{GetS2enemies|location=[[Two River Principality]]}} | |||
{{ | |||
===Two River Sewers=== | |||
{{ | {{GetS2enemies|location=[[Two River Sewers]]}} | ||
===Two River City=== | |||
{{GetS2enemies|location=[[Two River City]]}} | |||
{{ | |||
===Kobold Forest=== | |||
{{GetS2enemies|location=[[Kobold Village Forest]]}} | |||
{{ | |||
===Area E (Greenhill Principality)=== | |||
{{GetS2enemies|location=[[Greenhill Principality]]}} | |||
{{ | |||
===Greenhill Forest=== | |||
{{GetS2enemies|location=[[Greenhill Forest]]}} | |||
{{ | |||
===Road to Matilda=== | |||
{{ | {{GetS2enemies|location=[[Road to Matilda]]}} | ||
===Forest Village=== | |||
{{ | {{GetS2enemies|location=[[Forest Village]]}} | ||
===Area F (Matilda Knightdom)=== | |||
{{GetS2enemies|location=[[Matilda Knightdom]]}} | |||
{{ | |||
===Rakutei Mountain=== | |||
{{GetS2enemies|location=[[Rakutei Mountain]]}} | |||
{{ | |||
===Area B (Muse Principality)=== | |||
{{GetS2enemies|location=[[Muse Principality]] (Chapter 6)}} | |||
{{ | |||
===Muse City=== | |||
{{GetS2enemies|location=[[Muse City]] (Chapter 6)}} | |||
{{ | |||
===Banner Pass=== | |||
{{ | {{GetS2enemies|location=[[Banner Pass]]}} | ||
===Battle with Luca=== | |||
{{GetS2enemies|location=Battle with Luca}} | |||
{{ | |||
===Muse City=== | |||
{{ | {{GetS2enemies|location=[[Muse City]] (Chapter 8)}} | ||
===Lampdragon Mountain=== | |||
{{ | {{GetS2enemies|location=[[Lampdragon Mountain]]}} | ||
===Area G (Tinto Principality)=== | |||
{{GetS2enemies|location=[[Tinto Principality]]}} | |||
{{ | |||
===Tinto Mines=== | |||
{{GetS2enemies|location=[[Tinto Mines]] (Chapter 8)}} | |||
{{ | |||
===Tigermouth Village=== | |||
{{ | {{GetS2enemies|location=[[Tigermouth Village]]}} | ||
===Crom Village=== | |||
{{GetS2enemies|location=[[Crom Village]]}} | |||
{{ | |||
===Tinto Mines=== | |||
{{ | {{GetS2enemies|location=[[Tinto Mines]] (Chapter 9)}} | ||
===Tinto City=== | |||
{{ | {{GetS2enemies|location=[[Tinto City]]}} | ||
===Headquarters=== | |||
{{ | {{GetS2enemies|location=[[New Alliance Army Headquarters]]}} | ||
===Area E (Greenhill Principality)=== | |||
{{GetS2enemies|location=[[Greenhill Principality]] (Chapter 9)}} | |||
{{ | |||
===Greenhill Forest=== | |||
{{ | {{GetS2enemies|location=[[Greenhill Forest]] (Chapter 9)}} | ||
===Greenhill City=== | |||
{{ | {{GetS2enemies|location=[[Greenhill City]] (Chapter 9)}} | ||
===Muse City=== | |||
{{ | {{GetS2enemies|location=[[Muse City]] (Chapter 9)}} | ||
===Area B (Muse Principality)=== | |||
{{ | {{GetS2enemies|location=[[Muse Principality]] (Chapter 9)}} | ||
===Area F (Matilda Knightdom)=== | |||
{{GetS2enemies|location=[[Matilda Knightdom]] (Chapter 10)}} | |||
{{ | |||
===Rockaxe Castle=== | |||
{{ | {{GetS2enemies|location=[[Rockaxe Castle]]}} | ||
===Rakutei Mountain=== | |||
{{ | {{GetS2enemies|location=[[Rakutei Mountain]] (Chapter 10)}} | ||
===Area J (Highland)=== | |||
{{GetS2enemies|location=Outside [[L'Renouille]]}} | |||
{{ | |||
===Tenzan Pass=== | |||
{{GetS2enemies|location=[[Tenzan Pass]] (Chapter 10)}} | |||
{{ | |||
{{ | ===L'Renouille Palace=== | ||
{{GetS2enemies|location=[[L'Renouille Palace]]}} | |||
{{Navbox S2}}{{Short description|Table of all enemies the player can encounter in Suikoden II}} | {{Navbox S2}}{{Short description|Table of all enemies the player can encounter in Suikoden II}} | ||
[[Category:Suikoden II]] | [[Category:Suikoden II]] | ||
[[Category:Suikoden I&II HD Remaster]] | [[Category:Suikoden I&II HD Remaster]] | ||
Latest revision as of 22:28, 12 December 2025
In Suikoden II, players encounter a diverse range of enemies, each with unique abilities, attack patterns, and weaknesses. This list details all hostile creatures, bosses, and adversaries found throughout the game, detailing their level, HP, potch, and item drops. Each enemy also has a more detailed page with full stats, attacks, and weaknesses.
Difficulties
Introduced in Suikoden I&II HD Remaster, there are two additional difficulty levels that adjust enemy HP.
Easy mode multiplies enemy HP by 0.8x.
Hard mode multiplies enemy HP by 1.2x.
Enemy list
Tenzan Pass
| Enemy Units | Name | LV | HP | Potch | Items |
|---|---|---|---|---|---|
.png) |
Highland Soldier | 2 | 15 | 50 | |
.png) |
Highland Soldier | 2 | 15 | 100 | |
.png) |
Commander | 4 | 50 | 100 |
Area A (East Muse Principality)
| Enemy Units | Name | LV | HP | Potch | Items |
|---|---|---|---|---|---|
.png) |
Holly Boy | 1 | 10 | 5 | |
.png) |
FurFur | 2 | 30 | 30 | |
.png) |
Blade Bunny | 3 | 40 | 50 |
North Swallow Pass
| Enemy Units | Name | LV | HP | Potch | Items |
|---|---|---|---|---|---|
|
Blade Bunny | 3 | 40 | 50 | |
.png) |
Killer Bee | 3 | 22 | 15 | |
.png) |
Bandit A | 4 | 35 | 150 | |
.png) |
Bandit B | 4 | 35 | 150 | |
.png) |
Bandit C | 4 | 35 | 150 | |
.png) |
Furball | 4 | 40 | 35 | |
.png) |
Wolf | 5 | 60 | 60 |
|
.png) |
Mist Shade | 10 | 800 | 2000 | |
.png) |
Mist Shade | 10 | 800 | 2000 |
Area J (Kyaro Town area)
| Enemy Units | Name | LV | HP | Potch | Items |
|---|---|---|---|---|---|
|
Blade Bunny | 3 | 40 | 60 | |
|
Furball | 4 | 40 | 40 | |
.png) |
Spider | 5 | 60 | 100 |
Kyaro Town
| Enemy Units | Name | LV | HP | Potch | Items |
|---|---|---|---|---|---|
.png) |
Highland Soldier | 4 | 30 | 50 |
|
|
Highland Soldier | 4 | 35 | 50 | |
|
Highland Soldier | 4 | 40 | 50 |
|
.png) |
Rowd | 25 | 3000 | 10000 |
|
Area A (East Muse Principality)
| Enemy Units | Name | LV | HP | Potch | Items |
|---|---|---|---|---|---|
|
Furball | 4 | 45 | 60 | |
.png) |
Woodpecker | 5 | 40 | 80 | |
.png) |
Shadow Dog | 7 | 85 | 130 |
Ryube Forest
| Enemy Units | Name | LV | HP | Potch | Items |
|---|---|---|---|---|---|
|
Woodpecker | 5 | 45 | 80 | |
|
Spider | 7 | 100 | 100 | |
.png) |
Giant Snail | 8 | 80 | 200 | |
.png) |
Wild Boar | 10 | 300 | 250 | |
.png) |
Bonaparte | 13 | 600 | 0 |
|
Mercenary Fortress
| Enemy Units | Name | LV | HP | Potch | Items |
|---|---|---|---|---|---|
|
Highland Soldier | 8 | 45 | 100 |
|
|
Highland Soldier | 8 | 55 | 100 | |
|
Highland Soldier | 8 | 60 | 100 | |
|
Commander | 11 | 120 | 250 |
Area B (Muse Principality)
| Enemy Units | Name | LV | HP | Potch | Items |
|---|---|---|---|---|---|
.png) |
Poison Spider | 7 | 130 | 100 | |
.png) |
Sickle | 10 | 70 | 200 | |
.png) |
Gold Boar | 11 | 250 | 300 |
Sindar Ruins
| Enemy Units | Name | LV | HP | Potch | Items |
|---|---|---|---|---|---|
.png) |
Creeper | 12 | 120 | 50 |
|
.png) |
Nightmare | 13 | 90 | 250 | |
.png) |
Mega Watt | 14 | 150 | 300 | |
.png) |
Salamander | 15 | 200 | 4000 | |
.png) |
Mr. Venus | 16 | 270 | 400 | |
.png) |
Double Head | 25 | 2500 | 4000 |
Muse-Highland Checkpoint
| Enemy Units | Name | LV | HP | Potch | Items |
|---|---|---|---|---|---|
.png) |
Armadillon | 18 | 120 | 350 | |
|
Highland Soldier | 19 | 80 | 150 |
|
|
Highland Soldier | 19 | 90 | 150 | |
|
Highland Soldier | 19 | 110 | 150 | |
.png) |
Killer Bunny | 19 | 170 | 300 | |
.png) |
Armadilloid | 25 | 70 | 7000 |
Muse City
| Enemy Units | Name | LV | HP | Potch | Items |
|---|---|---|---|---|---|
|
Highland Soldier | 19 | 70 | 150 | |
|
Highland Soldier | 19 | 80 | 150 | |
|
Highland Soldier | 19 | 100 | 150 |
|
|
Commander | 22 | 120 | 400 |
Area C (South Window Principality)
| Enemy Units | Name | LV | HP | Potch | Items |
|---|---|---|---|---|---|
.png) |
Flying Squirrel | 18 | 75 | 150 | |
.png) |
Black Bunny | 19 | 120 | 350 | |
.png) |
Target Lady | 20 | 130 | 600 |
North Window
| Enemy Units | Name | LV | HP | Potch | Items |
|---|---|---|---|---|---|
.png) |
Zombie | 22 | 130 | 90 |
|
.png) |
Zombie | 22 | 150 | 110 | |
.png) |
Neclord | 35 | 20000 | 70000 |
|
Cave of the Wind
| Enemy Units | Name | LV | HP | Potch | Items |
|---|---|---|---|---|---|
.png) |
Griffin | 21 | 135 | 500 | |
.png) |
Sorcerer | 22 | 110 | 450 | |
.png) |
Minos | 23 | 170 | 500 | |
.png) |
Sun King | 24 | 350 | 700 | |
.png) |
Celestial Sword | 32 | 2500 | 0 |
|
North Window Castle
| Enemy Units | Name | LV | HP | Potch | Items |
|---|---|---|---|---|---|
|
Zombie | 24 | 140 | 100 | |
|
Zombie | 24 | 160 | 120 | |
.png) |
Shadow Man | 25 | 220 | 300 | |
|
Sorcerer | 26 | 170 | 100 | |
.png) |
Abomination | 34 | 4500 | 10000 |
|
Area D (Two River Principality)
| Enemy Units | Name | LV | HP | Potch | Items |
|---|---|---|---|---|---|
.png) |
Rockadillo | 26 | 140 | 550 | |
.png) |
Spikebeak | 27 | 180 | 600 | |
.png) |
Sandillo | 33 | 120 | 15000 |
Two River Sewers
| Enemy Units | Name | LV | HP | Potch | Items |
|---|---|---|---|---|---|
.png) |
Siren | 27 | 110 | 800 | |
.png) |
Devil Eye | 28 | 150 | 600 | |
.png) |
Land Shark | 28 | 110 | 800 | |
.png) |
Shadow | 29 | 130 | 900 | |
.png) |
Pest Rat | 40 | 5200 | 20000 |
Two River City
| Enemy Units | Name | LV | HP | Potch | Items |
|---|---|---|---|---|---|
.png) |
Highland Soldier | 32 | 95 | 500 |
|
.png) |
Highland Soldier | 32 | 110 | 500 | |
.png) |
Highland Soldier | 32 | 120 | 500 | |
.png) |
Commander | 34 | 170 | 700 |
Kobold Forest
| Enemy Units | Name | LV | HP | Potch | Items |
|---|---|---|---|---|---|
.png) |
Mirage | 31 | 220 | 800 | |
.png) |
Eagle Man | 32 | 180 | 1100 |
Area E (Greenhill Principality)
| Enemy Units | Name | LV | HP | Potch | Items |
|---|---|---|---|---|---|
|
Holly Boy | 15 | 45 | 100 |
|
.png) |
Ragged One | 29 | 165 | 5 | |
.png) |
Sauroid | 30 | 200 | 600 |
Greenhill Forest
| Enemy Units | Name | LV | HP | Potch | Items |
|---|---|---|---|---|---|
|
Holly Boy | 15 | 45 | 100 | |
.png) |
Melonzoo | 31 | 167 | 750 | |
.png) |
Holly Elf | 32 | 170 | 1200 | |
.png) |
Monwer | 32 | 90 | 800 |
|
|
Highland Soldier | 33 | 110 | 700 | |
|
Highland Soldier | 33 | 120 | 700 | |
|
Highland Soldier | 33 | 130 | 700 |
Road to Matilda
| Enemy Units | Name | LV | HP | Potch | Items |
|---|---|---|---|---|---|
|
Holly Boy | 15 | 45 | 100 | |
.png) |
Papa Holly | 32 | 650 | 1300 | |
.png) |
DoReMi Elf | 33 | 230 | 900 | |
.png) |
DoReMi Elf | 33 | 230 | 900 | |
.png) |
DoReMi Elf | 33 | 230 | 900 | |
.png) |
DoReMi Elf | 33 | 230 | 900 | |
.png) |
DoReMi Elf | 33 | 230 | 900 | |
.png) |
DoReMi Elf | 33 | 230 | 900 | |
.png) |
Zombie Slug | 33 | 320 | 1000 |
Forest Village
| Enemy Units | Name | LV | HP | Potch | Items |
|---|---|---|---|---|---|
|
Griffin | 32 | 370 | 1200 |
Area F (Matilda Knightdom)
| Enemy Units | Name | LV | HP | Potch | Items |
|---|---|---|---|---|---|
.png) |
Pink Bird | 34 | 210 | 2000 | |
.png) |
Phantom | 35 | 250 | 1500 |
Rakutei Mountain
| Enemy Units | Name | LV | HP | Potch | Items |
|---|---|---|---|---|---|
.png) |
Spiker | 34 | 120 | 1200 | |
.png) |
Assassin | 35 | 140 | 1100 | |
.png) |
Pixie | 36 | 60 | 2000 | |
.png) |
Hawk Man | 37 | 260 | 1400 | |
.png) |
Harpy | 45 | 7400 | 40000 |
|
Area B (Muse Principality)
| Enemy Units | Name | LV | HP | Potch | Items |
|---|---|---|---|---|---|
.png) |
Clock Knight | 35 | 160 | 3000 | |
.png) |
White Tiger | 35 | 230 | 3000 |
Muse City
| Enemy Units | Name | LV | HP | Potch | Items |
|---|---|---|---|---|---|
|
Highland Soldier | 36 | 160 | 900 | |
|
Highland Soldier | 36 | 180 | 900 | |
|
Highland Soldier | 36 | 180 | 900 |
Banner Pass
| Enemy Units | Name | LV | HP | Potch | Items |
|---|---|---|---|---|---|
.png) |
RanRan | 36 | 140 | 2000 | |
.png) |
RinRin | 36 | 150 | 2300 | |
.png) |
TenTen | 36 | 130 | 1500 | |
.png) |
Tiger | 37 | 180 | 3500 | |
.png) |
Samurai | 38 | 250 | 2500 | |
.png) |
Worm | 44 | 2800 | 0 |
|
|
Worm | 44 | 4200 | 35000 |
|
.png) |
Poison Moth | 47 | 6800 | 50000 |
|
Battle with Luca
| Enemy Units | Name | LV | HP | Potch | Items |
|---|---|---|---|---|---|
.png) |
White Wolf Soldier | 39 | 190 | 2000 | |
.png) |
White Wolf Soldier | 39 | 205 | 2000 | |
.png) |
Luca Blight | 54 | 6500 | 15000 |
|
Muse City
| Enemy Units | Name | LV | HP | Potch | Items |
|---|---|---|---|---|---|
|
Highland Soldier | 41 | 170 | 1300 |
|
|
Highland Soldier | 41 | 180 | 1300 | |
|
Highland Soldier | 41 | 187 | 1300 | |
|
Commander | 43 | 220 | 1500 |
Lampdragon Mountain
| Enemy Units | Name | LV | HP | Potch | Items |
|---|---|---|---|---|---|
.png) |
Killer Dog | 41 | 180 | 1800 | |
.png) |
Air Lizard | 42 | 350 | 2000 | |
.png) |
Zombie | 42 | 140 | 281 | |
.png) |
Zombie | 42 | 155 | 323 |
Area G (Tinto Principality)
| Enemy Units | Name | LV | HP | Potch | Items |
|---|---|---|---|---|---|
.png) |
Skeleton | 39 | 170 | 652 | |
.png) |
Skeleton | 39 | 178 | 730 | |
.png) |
Ghost Slug | 40 | 450 | 3000 |
Tinto Mines
| Enemy Units | Name | LV | HP | Potch | Items |
|---|---|---|---|---|---|
|
Zombie | 42 | 130 | 290 | |
|
Zombie | 42 | 140 | 332 | |
|
Neclord | 50 | 20000 | 0 |
|
Tigermouth Village
| Enemy Units | Name | LV | HP | Potch | Items |
|---|---|---|---|---|---|
|
Zombie | 42 | 150 | 340 | |
|
Zombie | 42 | 150 | 340 | |
.png) |
Sierra | 47 | 2800 | 0 |
|
Crom Village
| Enemy Units | Name | LV | HP | Potch | Items |
|---|---|---|---|---|---|
|
Zombie | 41 | 140 | 339 | |
|
Zombie | 41 | 160 | 347 |
Tinto Mines
| Enemy Units | Name | LV | HP | Potch | Items |
|---|---|---|---|---|---|
|
Zombie | 43 | 210 | 384 | |
|
Zombie | 43 | 230 | 363 | |
|
Skeleton | 44 | 200 | 573 | |
|
Skeleton | 44 | 208 | 765 | |
.png) |
Neclordia | 45 | 320 | 3500 | |
.png) |
Zombie Unicorn | 46 | 570 | 4000 | |
.png) |
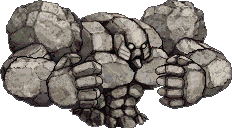
Stone Golem | 55 | 7500 | 50000 |
|
Tinto City
| Enemy Units | Name | LV | HP | Potch | Items |
|---|---|---|---|---|---|
|
Zombie | 45 | 210 | 377 | |
|
Zombie | 45 | 230 | 354 | |
|
Neclord | 50 | 4500 | 70000 |
Headquarters
| Enemy Units | Name | LV | HP | Potch | Items |
|---|---|---|---|---|---|
.png) |
Lucia | 49 | 1500 | 20000 |
|
Area E (Greenhill Principality)
| Enemy Units | Name | LV | HP | Potch | Items |
|---|---|---|---|---|---|
.png) |
Eye Flower | 45 | 260 | 3500 | |
.png) |
Kookaburra | 47 | 300 | 5000 |
Greenhill Forest
| Enemy Units | Name | LV | HP | Potch | Items |
|---|---|---|---|---|---|
|
Holly Boy | 30 | 83 | 800 | |
|
DoReMi Elf | 46 | 270 | 900 | |
|
DoReMi Elf | 46 | 270 | 900 | |
|
DoReMi Elf | 46 | 270 | 900 | |
|
DoReMi Elf | 46 | 270 | 900 | |
|
DoReMi Elf | 46 | 270 | 900 | |
|
DoReMi Elf | 46 | 270 | 900 | |
|
Highland Soldier | 47 | 260 | 2000 |
|
|
Highland Soldier | 47 | 270 | 2000 |
|
|
Highland Soldier | 47 | 280 | 2000 | |
.png) |
Holly Master | 47 | 260 | 4000 | |
.png) |
Target Girl | 48 | 270 | 4000 | |
|
Commander | 49 | 380 | 2500 | |
.png) |
Grand Holly | 49 | 1020 | 5500 | |
.png) |
Karayan Soldier | 49 | 350 | 1000 |
|
.png) |
Karayan Soldier | 49 | 350 | 1000 |
|
.png) |
Karayan Soldier | 49 | 350 | 1000 |
|
|
Lucia | 54 | 4700 | 30000 |
Greenhill City
| Enemy Units | Name | LV | HP | Potch | Items |
|---|---|---|---|---|---|
.png) |
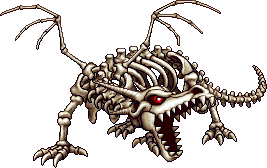
Bone Dragon | 56 | 8900 | 100000 |
|
Muse City
| Enemy Units | Name | LV | HP | Potch | Items |
|---|---|---|---|---|---|
.png) |
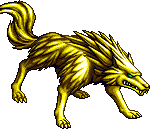
Golden Wolf | 49 | 3500 | 10000 |
|
Area B (Muse Principality)
| Enemy Units | Name | LV | HP | Potch | Items |
|---|---|---|---|---|---|
.png) |
Fisheye | 48 | 230 | 5500 | |
.png) |
Iron Moon | 50 | 440 | 7000 | |
.png) |
Copper Sun | 51 | 600 | 7000 |
Area F (Matilda Knightdom)
| Enemy Units | Name | LV | HP | Potch | Items |
|---|---|---|---|---|---|
.png) |
Fei Yu | 50 | 280 | 5000 | |
.png) |
Li Lan | 50 | 320 | 5300 | |
.png) |
Shiu Lin | 50 | 250 | 4100 | |
.png) |
Black Tiger | 52 | 420 | 15000 |
Rockaxe Castle
| Enemy Units | Name | LV | HP | Potch | Items |
|---|---|---|---|---|---|
|
Highland Soldier | 51 | 270 | 3500 | |
|
Highland Soldier | 51 | 280 | 3500 | |
|
Highland Soldier | 51 | 290 | 3500 | |
.png) |
Cockatrice | 52 | 440 | 6000 | |
|
Commander | 52 | 350 | 5000 | |
.png) |
Hippogriff | 53 | 360 | 9000 | |
.png) |
Matilda Knight | 53 | 410 | 7000 | |
.png) |
Gordeau | 59 | 4500 | 90000 |
Rakutei Mountain
| Enemy Units | Name | LV | HP | Potch | Items |
|---|---|---|---|---|---|
.png) |
Sky Knight | 52 | 270 | 8000 | |
.png) |
Leathercut | 53 | 220 | 6500 | |
.png) |
Iron Claw | 54 | 320 | 9000 |
|
|
Pixie | 55 | 130 | 30000 | |
|
Harpy | 60 | 12000 | 150000 |
|
Area J (Highland)
| Enemy Units | Name | LV | HP | Potch | Items |
|---|---|---|---|---|---|
.png) |
Minotaurus | 54 | 280 | 13000 | |
.png) |
Colossus | 58 | 1500 | 15000 |
Tenzan Pass
| Enemy Units | Name | LV | HP | Potch | Items |
|---|---|---|---|---|---|
.png) |
Magus | 54 | 330 | 15000 | |
|
Minotaurus | 54 | 300 | 13000 |
L'Renouille Palace
| Enemy Units | Name | LV | HP | Potch | Items |
|---|---|---|---|---|---|
.png) |
Highland Soldier | 54 | 285 | 10000 |
|
.png) |
Highland Soldier | 54 | 290 | 10000 |
|
.png) |
Highland Soldier | 54 | 310 | 10000 | |
.png) |
Chimera | 55 | 750 | 17000 | |
.png) |
Commander | 56 | 370 | 15000 | |
|
Magus | 56 | 350 | 14000 | |
.png) |
Bronzem | 58 | 1700 | 20000 | |
|
Lucia | 58 | 6500 | 50000 | |
.png) |
Culgan | 65 | 3800 | 70000 | |
.png) |
Seed | 65 | 4200 | 60000 | |
.png) |
Left Head | 75 | 4800 | 200000 |
|
.png) |
Left Leg | 75 | 4500 | 200000 |
|
.png) |
Right Head | 75 | 4800 | 20000 |
|
.png) |
Right Leg | 75 | 5700 | 200000 |
|
.png) |
Rune | 75 | 3300 | 200000 |
|