
Muse-Highland Border: Difference between revisions
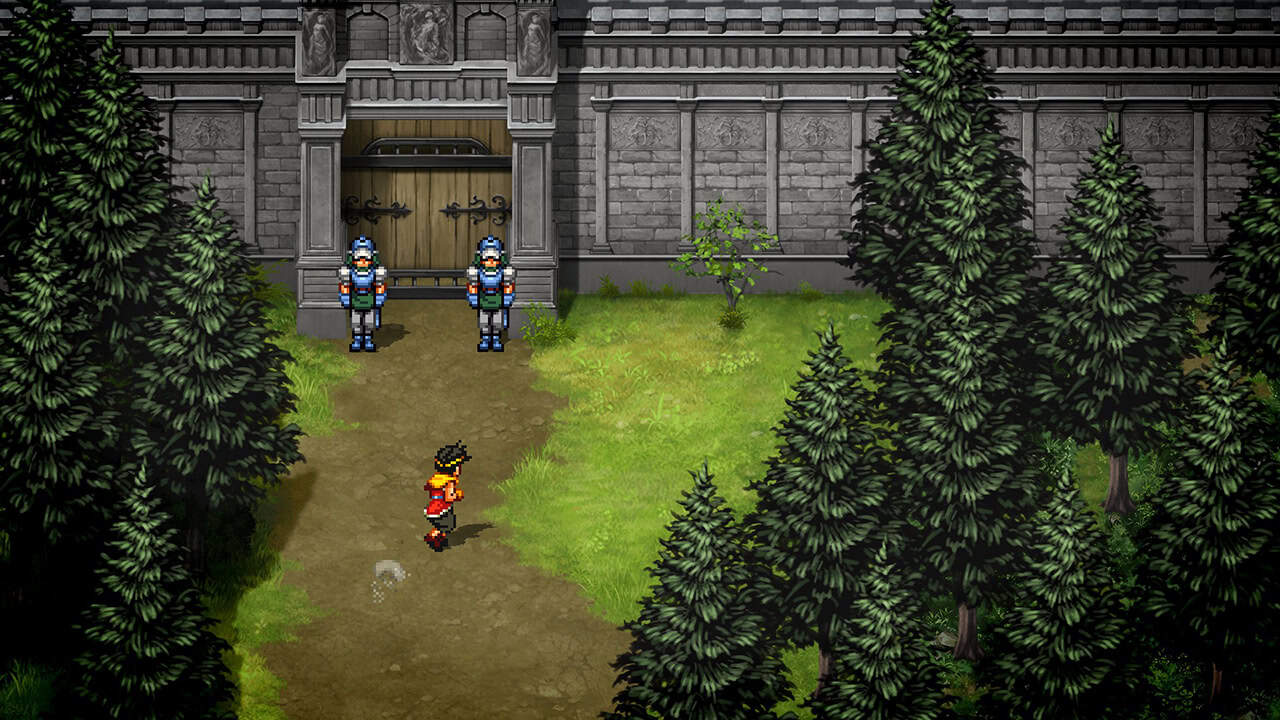
Fortified Wall between Muse Principality and the Highland Kingdom
More actions
No edit summary |
m →Enemies |
||
| (6 intermediate revisions by 2 users not shown) | |||
| Line 3: | Line 3: | ||
|jpname= | |jpname= | ||
|roname= | |roname= | ||
|image=Muse-Highland | |image=Muse-Highland Checkpoint.jpg | ||
|type= Fortification | |type= Fortification | ||
|region=[[Dunan (region)|Dunan]] | |region=[[Dunan (region)|Dunan]] | ||
|S2 = yes | |S2 = yes | ||
}} | }} | ||
The '''Muse-Highland Border''' is a fortified wall which appears in [[Suikoden II]]. It is located between | The '''Muse-Highland Border''' is a fortified wall which appears in [[Suikoden II]]. It is located between [[Muse Principality]] and the [[Highland Kingdom]]. | ||
==Information== | ==Information== | ||
After invading Eastern Muse via [[North | After invading Eastern Muse via [[North Swallow Pass]] and destroying the towns and forts in that area, the main force of the Highland army set up camp just north of the Muse-Highland Border wall. The hero and [[Jowy]] were recruited by [[Jess]] to don Highland Youth Brigade uniforms and infiltrate this camp to determine the amount of supplies and therefore the likely strategy of this army. | ||
Overwhelmed by the Highland forces, this wall remained intact throughout the Dunan Unification war and was the last fortification to fall before the siege of [[L'Renouille]]. | Overwhelmed by the Highland forces, this wall remained intact throughout the Dunan Unification war and was the last fortification to fall before the siege of [[L'Renouille]]. | ||
==Enemies== | ==Enemies== | ||
{{ | {{GetS2enemies|location=[[Muse-Highland Checkpoint]]}} | ||
==Enemy Formations== | ==Enemy Formations== | ||
{| class="wikitable" | {| class="wikitable-nova" style="max-width:100%; width: 100%" | ||
| align="center" | | | align="center" style="background: rgba(0, 119, 192, .1);" | | ||
{| | {| cellpadding="5" | | ||
| | | | ||
| | | | ||
| Line 36: | Line 30: | ||
| [[File:Killer_Bunny_(S2_PS1_enemy).png]] | | [[File:Killer_Bunny_(S2_PS1_enemy).png]] | ||
|} | |} | ||
| align="center" | | | align="center" style="background: rgba(0, 119, 192, .1);" | | ||
{| | {| cellpadding="5" | | ||
| | | | ||
| | | | ||
| Line 46: | Line 40: | ||
| [[File:Killer_Bunny_(S2_PS1_enemy).png]] | | [[File:Killer_Bunny_(S2_PS1_enemy).png]] | ||
|} | |} | ||
| align="center" | | align="center" style="background: rgba(0, 119, 192, .1);" | | ||
{| cellpadding="5" | | |||
{| | |||
| [[File:Killer_Bunny_(S2_PS1_enemy).png]] | | [[File:Killer_Bunny_(S2_PS1_enemy).png]] | ||
| | | | ||
| Line 73: | Line 50: | ||
| [[File:Killer_Bunny_(S2_PS1_enemy).png]] | | [[File:Killer_Bunny_(S2_PS1_enemy).png]] | ||
|} | |} | ||
| align="center" | | | align="center" style="background: rgba(0, 119, 192, .1);" | | ||
{| | {| cellpadding="5" | | ||
| [[File:Killer_Bunny_(S2_PS1_enemy).png]] | | [[File:Killer_Bunny_(S2_PS1_enemy).png]] | ||
| [[File:Killer_Bunny_(S2_PS1_enemy).png]] | | [[File:Killer_Bunny_(S2_PS1_enemy).png]] | ||
| Line 82: | Line 59: | ||
| [[File:Killer_Bunny_(S2_PS1_enemy).png]] | | [[File:Killer_Bunny_(S2_PS1_enemy).png]] | ||
| [[File:Killer_Bunny_(S2_PS1_enemy).png]] | | [[File:Killer_Bunny_(S2_PS1_enemy).png]] | ||
|} | |||
|- | |||
| align="center" | | |||
{| cellpadding="5" | | |||
| | |||
| | |||
| | |||
|- | |||
| [[File:Armadillon.png]] | |||
| | |||
| [[File:Armadillon.png]] | |||
|} | |||
| align="center" | | |||
{| cellpadding="5" | | |||
| | |||
|- | |||
| align="center" | [[File:Armadillon.png]][[File:Armadillon.png]][[File:Armadillon.png]] | |||
|} | |} | ||
| align="center" | | | align="center" | | ||
{| | {| cellpadding="5" | | ||
| align="center" | [[File:Armadillon.png]] | | align="center" | [[File:Armadillon.png]] | ||
|- | |- | ||
| Line 90: | Line 84: | ||
|} | |} | ||
| align="center" | | | align="center" | | ||
{| | {| cellpadding="5" | | ||
| align="left" |[[File:Armadillon.png]] | | align="left" |[[File:Armadillon.png]] | ||
| align="right" | [[File:Armadillon.png]] | | align="right" | [[File:Armadillon.png]] | ||
| Line 97: | Line 91: | ||
|} | |} | ||
|- | |- | ||
| align="center" | | | align="center" style="background: rgba(0, 119, 192, .1);" | | ||
{| | {| cellpadding="5" | | ||
| align="center" | [[File:Armadillon.png]][[File:Armadilloid.png]][[File:Armadillon.png]] | | align="center" | [[File:Armadillon.png]][[File:Armadilloid.png]][[File:Armadillon.png]] | ||
|- | |- | ||
| align="center" | [[File:Armadillon.png]][[File:Armadillon.png]][[File:Armadillon.png]] | | align="center" | [[File:Armadillon.png]][[File:Armadillon.png]][[File:Armadillon.png]] | ||
|} | |} | ||
| align="center" | | | align="center" style="background: rgba(0, 119, 192, .1);" | | ||
{| | {| cellpadding="5" | | ||
| | | | ||
| [[File:Highland_Soldier_(bow).png]] | | [[File:Highland_Soldier_(bow).png]] | ||
| Line 113: | Line 107: | ||
| [[File:Highland_Soldier.png]] | | [[File:Highland_Soldier.png]] | ||
|} | |} | ||
| align="center" | | | align="center" style="background: rgba(0, 119, 192, .1);" | | ||
{| | {| cellpadding="5" | | ||
| [[File:Highland_Soldier_(bow).png]] | | [[File:Highland_Soldier_(bow).png]] | ||
| [[File:Highland_Soldier_(bow).png]] | | [[File:Highland_Soldier_(bow).png]] | ||
| [[File:Highland_Soldier_(bow).png]] | | [[File:Highland_Soldier_(bow).png]] | ||
|- | |- | ||
| [[File:Highland_Soldier.png]] | | align="center" | [[File:Highland_Soldier.png]] | ||
| [[File:Highland_Soldier_(spear).png]] | | [[File:Highland_Soldier_(spear).png]] | ||
| [[File:Highland_Soldier.png]] | | align="center" | [[File:Highland_Soldier.png]] | ||
|} | |} | ||
|} | |} | ||
{{Navbox S2 locations}} {{Short description|Fortified Wall between Muse Principality and the Highland Kingdom}} | {{Navbox S2 locations}} {{Short description|Fortified Wall between Muse Principality and the Highland Kingdom}} | ||
Latest revision as of 21:13, 15 December 2025
Muse-Highland Border

Meta Information
Appearances
The Muse-Highland Border is a fortified wall which appears in Suikoden II. It is located between Muse Principality and the Highland Kingdom.
Information
After invading Eastern Muse via North Swallow Pass and destroying the towns and forts in that area, the main force of the Highland army set up camp just north of the Muse-Highland Border wall. The hero and Jowy were recruited by Jess to don Highland Youth Brigade uniforms and infiltrate this camp to determine the amount of supplies and therefore the likely strategy of this army.
Overwhelmed by the Highland forces, this wall remained intact throughout the Dunan Unification war and was the last fortification to fall before the siege of L'Renouille.
Enemies
| Enemy Units | Name | LV | HP | Potch | Items |
|---|---|---|---|---|---|
.png) |
Armadillon | 18 | 120 | 350 | |
.png) |
Highland Soldier | 19 | 80 | 150 |
|
.png) |
Highland Soldier | 19 | 90 | 150 | |
.png) |
Highland Soldier | 19 | 110 | 150 | |
.png) |
Killer Bunny | 19 | 170 | 300 | |
.png) |
Armadilloid | 25 | 70 | 7000 |
Enemy Formations
|
|
|
| ||||||||||||||||||||||||
|
|
|
| ||||||||||||||||||||||||
|
|
| |||||||||||||||||||||||||