For Obel's Freedom: Difference between revisions
More actions
m Text replacement - "|jp_name" to "|japanese_name" |
|||
| Line 12: | Line 12: | ||
{{Fleet IV | {{Fleet IV | ||
|name=Headquarters Ship | |name=Headquarters Ship | ||
| | |japanese_name=本拠地船 | ||
|romaji_name=Honkyochi-sen | |romaji_name=Honkyochi-sen | ||
|image=Headquarters Ship | |image=Headquarters Ship | ||
| Line 23: | Line 23: | ||
|underlings=''Player assigned'' | |underlings=''Player assigned'' | ||
|name2=The Grishend | |name2=The Grishend | ||
| | |japanese_name2=グリシェンデ号 | ||
|romaji_name2=Gurishende-gō | |romaji_name2=Gurishende-gō | ||
|image2=The Grishend | |image2=The Grishend | ||
| Line 34: | Line 34: | ||
|underlings2=''Player assigned'' | |underlings2=''Player assigned'' | ||
|name3=Gaien Ship | |name3=Gaien Ship | ||
| | |japanese_name3=ガイエン船 | ||
|romaji_name3=Gaien-sen | |romaji_name3=Gaien-sen | ||
|image3=Gaien Ship | |image3=Gaien Ship | ||
| Line 49: | Line 49: | ||
{{Fleet IV | {{Fleet IV | ||
|name=Kooluk Ship A | |name=Kooluk Ship A | ||
| | |japanese_name=クールーク船A | ||
|romaji_name=Kūrūku-sen A | |romaji_name=Kūrūku-sen A | ||
|image= 2nd Kooluk Fleet Ship | |image= 2nd Kooluk Fleet Ship | ||
| Line 60: | Line 60: | ||
|underlings=200 | |underlings=200 | ||
|name2=Kooluk Ship B | |name2=Kooluk Ship B | ||
| | |japanese_name2=クールーク船B | ||
|romaji_name2=Kūrūku-sen B | |romaji_name2=Kūrūku-sen B | ||
|image2= 2nd Kooluk Fleet Ship | |image2= 2nd Kooluk Fleet Ship | ||
Revision as of 01:07, 22 August 2020

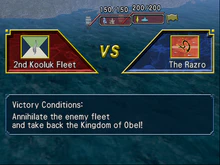
For Obel's Freedom (オベル王国奪回戦, Oberu Ōkoku Dakkaisen, Obel Kingdom Recapture) is a naval battle that occurs in Suikoden IV. It is the ninth such battle of the game.
Information
This battle was an attempt by the Allied Forces, having amassed significant support, to liberate the occupied Kingdom of Obel from the Kooluk Empire.
Before the battle, 2nd Kooluk Fleet commander Colton had planned a strategy of holding reinforcements within Obel's large sea cave (the same one the Headquarters Ship was originally hidden in), in order to launch a pincer attack. However, allied strategist Elenor Silverberg was able to anticipate the plan and communicated through Mizuki with Princess Flare to prevent said reinforcements from being deployed.
Flare's attack prevented the reinforcements from joining their companions, splitting the Kooluk fleet's strength in two. As such, the 2nd Kooluk Fleet was defeated and Colton would be captured by the Allied Forces, resulting in the liberation of Obel.
Ships
Allied Forces
2nd Kooluk Fleet
References
- Gensosuikoden Kiwami Encyclopedia, page 399
